influxDB
influxDB is a fast open-source time-series database package. It can run on a variety of platforms and is also available as a managed, fully hosted service, from several vendors. As part of their “TICK” stack, InfluxData provides tools to facilitate collecting data from a variety of sources, as well as tools for infrastructure monitoring, alert management, data visualization, and database management. The popular grafana visualization tools also work well with influxDB.
IoTaWatt fully supports the influxDB HTTP API for uploading data to influxDB at a specific interval of 5 seconds to one hour. Like other similar IoTaWatt services, continuity of updates is maintained despite outages that may interrupt the communications.
This tutorial assumes you have established your own instance of influxDB or subscribed to a hosted service. It does not attempt to explain how to install or use influx or any of the related visualization tools. There’s a whole universe of enthusiastic users at the influxData forum, where you can get help with anything and everything.
influxDB versions 1.x and 2.x
With the introduction of nfluxDB 2.0 the basic measurement scheme remains the same, but there are significant changes:
- Authentication is changed from the basic userID/password of 1.x to use of an 88 character base64 token.
- Where version 1.x organizes into a database, version 2 introduces the concept of buckets.
- The native query in version 2 uses a new flux language as opposed to the influxQuery language in version 1.x.
There are various compatibility options available for transition fromversion 1.x to version 2, depending on the implementation (cloud or OSS), but IoTaWatt now supports both versions natively.
The two are similar enough that they will be covered together here with breakouts where needed to address the differences.
Configure influxDB uploader
To configure the influxDB upload service in IoTaWatt,
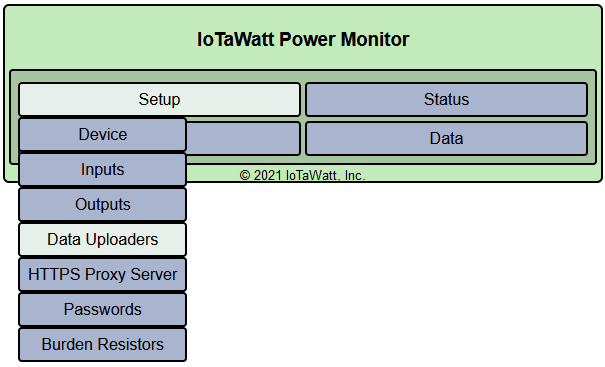
Hover over  and click
 from the dropdown menu.
Choose the appropriate version of influxDB…
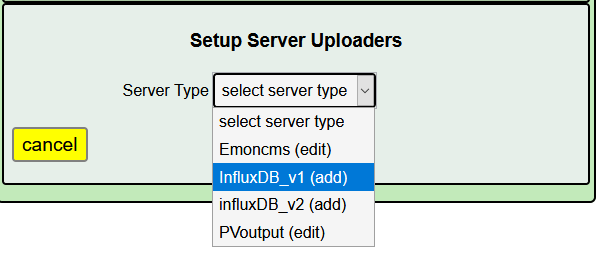
Depending on the version that you selected, you will get one of two similar setup menus.


- post interval
- Number of seconds that each data point will represent. The trade-off is between higher resolution (small interval) and minimizing the storage requirement of the data over time (larger interval). IoTaWatt accepts any value from 5 seconds to 3600 seconds (1 hour), in 5 second increments. Although not a strict requirement, it’s best to use a number that is an even factor or multiple of one minute: 5, 10, 15, 20, 30, 60, 120, etc.
- bulk send
- Number of interval postings to aggregate into a single HTTP request. Specifying 1 will send a data packet to influxDB at each interval. If your interval is 5 or 10, it will send a packet every 5 or 10 seconds. That’s fairly inefficient and can be problematic when there are internet connectivity issues. By specifying a larger bulk send, IoTaWatt will aggregate the posting data for the specified number of intervals and send the data in one packet. For instance if your interval is 10 seconds, specifying bulk send = 6 will cause data to be sent every 60 seconds. Large bulk send values will cause any real-time dashboards to update less frequently, so you should strike a balance. IoTaWatt keeps all of the data in the SD data log, so there is no risk of losing data by using this feature. Should there be any failure to deliver, IoTaWatt will pick up with the last successful posting when the problem is resolved.
- server URL
- URL of the influxDB server. If the URL begins with HTTPS:// you must have specified a HTTPSproxy_ server. The url may contain a domain name or an IP address. The :port number is optional and defaults to the influxDB port 8086 for version 1.
- upload history from
Specify the starting date that IoTaWatt will use to upload history to a new set of measurements. When the influxDBService starts, a query is made to determine the date/time of the last data written, qualified by the first tag-set. Data upload is initiated as follows:
Condition begin date specified begin date not specified new measurement set begin date 00:00 current date/time existing measurement set greater of last entry date/time or begin date last entry date/time - measurement
- Name that you assign to the measurements that IoTaWatt will be posting. The specification can be a constant string, or can include variables as explained below under variables. Note that if not specified, the variable $name will be used.
Unique Version 1 Parameters
- database
- Name of the influxDB database that you have created to be the repository for the IoTaWatt data.
- retention policy
- Optional name of the influxDB retention policy that you want to associate with the measurements that are written to influxDB. If not specified influx will use the default policy. If you specify a retention policy, it must be defined to influxDB before data can be written.
- username/password
- Optional security credentials. If specified, IoTaWatt will use standard authorization headers with these credentials.
Unique Version 2 Parameters
- bucket
- The name of the influxDB bucket to contain the measurements. Roughly the equivalent of the database in v1.
- organization ID
- The 16 hex-digit organization identifier obtained from influx. Roughly equivalent to a user ID.
- Authorization token
- Authorization token produced by influx. This is an 88 character base64 string that should be copied and pasted to avoid transcription errors. The token is the shared secret that authorizes access to the bucket.
tag-set
- tag-set
A collection of optional user specified tag-key/tag-value pairs that will be included as part of each measurement. The influx documentation somewhat explains them here. Basically, these tags each produce a table index that can be helpful in increasing the performance of data retrieval. The first tag-set is a special case for IoTaWatt, and if specified, is used to uniquely identify the measurement subset from this device so that upload can resume seamlessly. If this is not the only device that will be posting to the database, a unique identifier for this device should be included as the first entry in a tag-set. tag-values can be a constant string or can include variables as explained below under variables
edit an existing tag by clicking on it’s associated edit button, or add a new one with the add button. add tag-set

- field-key
- Each measurement contains a field key and field value. The field value is always the value specified in the “calculator” function. The field key to be used is specified here. It can be a constant string or can include variables as explained below under variables. If not specified, the default field key in each measurement is the string ‘value’.
measurements
- measurements
The set of *measurement*s that will be sent at each interval. The editor uses the “calculator” interface to create scripts to generate data using the various IoTaWatt inputs. Each entry will generate a measurement using the influx line protocol:
<measurement>[,tag-key1=tag-value1[,tag-key2=tag-value2...]] field-key=field-value time
Note that measurement, tag-value, and field-key are specified above and can be fixed strings or can be or contain variables. Some examples of the various ways this can be used to create different types of measurement specifications are given below.
As each measurement is written the $name and $units variables are assigned the value specified in the individual measurement specification.
The units of the field set defaults to watts. While Watts is the typical unit reported, the following additional units are available.
- watts
- volts
- VA
- pf
- Hz
- kW
- wH
- kWh
Once configured, a new influx service will be created. The current state of the service and the date/time of last update will be displayed under the influxDB tab in the status display.
influx status bar
The service can be started and stopped using the start/stop button. When a running influx service is changed, the service is automatically stopped and restarted.
Variables
Variables provide a way to further customize the way data is organized in your influxDB database. This tutorial will not get into the implications of different conventions, except to say that future generic visualization templates may be based on using the default specifications for measurement and field key.
There are three variables defined:
- $device - The name assigned to this IoTaWatt device in the device configuration section.
- $name - The name specified for the current measurement
- $units - The units specified for the current measurement
When these variables appear as all or part of the string specified for measurement field key or a tag value, the instance of the variable name is replaced by it’s value. Evaluation proceeds left to right in a string.
So as an example, when generating a measurement configured as:
with a device name of IotaHome and the current value of the input solar of 2944.6, the following different measurements could be generated:
| measurement | tag-value | field-key | measurement sent to influxDB |
|---|---|---|---|
| $name | value | solar value=2944.6 1523810195 (This is the default) | |
| $units | $device | $name | kWh,tag1=IotaHome solar=2944.6 1523810195 |
| $device | $name | $units | IotaHome,tag1=solar kWh=2944.6 1523810195 |
| $name.$units | value | solar.kWh value=2944.6 1523810195 | |
| power | $device.01 | $name | power,tag1=IotaHome.01 solar=2944.6 1523810195 |